Making Mars in 3D: Anaglyph
Have you ever experienced 3D cinema? We will follow the same principle to build 3D static pictures of Mars based on 2D photographs of the surface of Mars taken by rover Curiosity. This is a software and graphical design exercise. Have fun playing with actual pictures of Mars freely offered by NASA and become a master of open-source design software. And do not forget to put on your glasses and enjoy the result!
TIME
2-3 hours
MATERIALS
- 3D glasses
- Computer
- Internet connection
OBJETIVES
- Understanding the principle of 3D vision
- Understanding color filters
- Getting comfortable installing software
- Learning to use Gimp
- Finding out about rovers on Mars’
- Discovering Mars’ surface
INSTRUCTIONS
1. Enter the Curiosity raw images repository.
2. Navigate the web and find one picture that you like.
3. Duplicate it and call one copy “left” and the other one “right”.
Alternatively, or in addition, you may do the same with your own pictures of Aelita:
1. Place Aelita in any scenario you like.
2. Take a picture with the camera lens at the position of your left eye.
3. Repeat with your right eye.
From this point on, software instructions are given, which are the same for whatever pictures you use as an input.
4. Download GIMP and install
5. Open both images with GIMP: “right click>open with>GIMP” (or equivalent in your system). Alternatively, open GIMP and click on menu “File>Open” and navigate to the first picture on your computer. Do the same with the second one.
6. Stack the two of the images in two layers: Click on one of the images and select it (menu “Select>All”). Now copy it (menu “Edit>Copy”), click on the second image and paste the copied one on a second layer on top of it (menu “Edit>Paste as>New Layer”).
7. Make some color layers: Set a new foreground color to FF0000; this is red. Make a new layer (menu “Layer>New Layer) and select the Fill Type to be the foreground color. In the same dialog choose “Mode: Screen”. This will produce a flat red layer. Repeat the same steps but change the foreground color to 0000FF to produce a cyan layer.
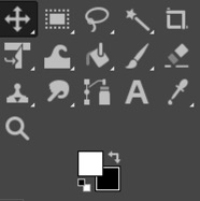
7.a. Foreground (white square) and background (blacksquare) colors control.
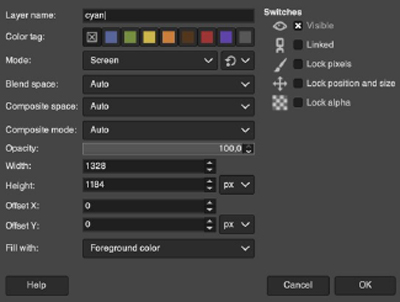
7.b. Dialog for the creation of a cyan layer in mode Screen.
8. Merge the layers: Move the layers so that you have them in this order: cyan, right-eye image, red, red-eye image. It is very important to get this right otherwise you will need to flip your red/blue glasses backwards (your left eye should see the red image). Activate only the cyan and right-eye image layers (i.e., hide the other two by clicking the eye symbols on the Layers Dialog). Merge those two layers (menu “Image -> Merge Visible Layers”). In the Layers Dialog mark “Mode: Multiply”.
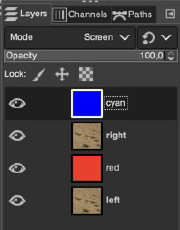
8.a. Layers Dialog with all of the four layers in the order they must follow.
Repeat to merge the red and the left-eye image layers.
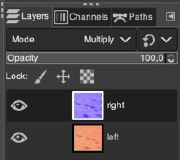
8.b. Layers dialog once pictures have been merged with flat colors and layers have been set to mode “Multiply”.
9. Put on your glasses and use the “Move” tool (top left corner) to displace a little the blue image until you get the desired 3D effect.
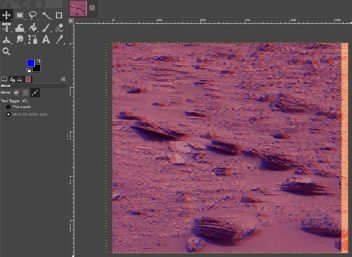
9.a. Final result when displacing bluish right and reddish left images.
EXPLANATION
By color-filtering two images and using 3D glasses, we are producing two images and letting each of them pass only by one of our eyes, even when we are focussing our eyes on the infinite. Different images through different eyes would trick our brain to interpret a 3D object that we are focussing on, as that is how we usually get the 3D vision.
If you use one single picture (as any from NASA repository), you will get some volume effect, but that will not be real 3D. An authentic 3D effect on a flat object would only be obtained when using two slightly different pictures: those obtained by your left and right eyes.
EXTRA
If it is not a flat object but it has some depth, the displacement of the objects on the front should be larger that of the objects on the back. To get such a realistic effect you may use a GIMP plugin. Just investigate documentation for installation and usage, and tweak it to get your best anaglyphs with real 3D effect.
Download the instructions for this experiment in Spanish, French and Dutch
Date:
26 de agosto de 2022


